Mausoleum
Head of Service
Logging in
In the Login dialog you type in the login data.
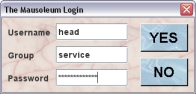
The Head of Service user has to be created by the Mausoleum Administrator. In the Administration window there is a function to define these users and their login credentials. In case you don't know the credentials you have to ask your Mausoleum administrator.
Visible objects
The objects which are controlled by the service group are
- Rooms
- Racks
- Users
In addition the head of the service group also sees the groups which are defined within this Mausoleum installation. The head of service can neither create nor delete groups. This is only possible for the Mausoleum administrator.
There are no mice, cages, lines, strains etc. present in the service group. Only the rooms and racks are controlled by this group. All other objects still belong to the individual groups. Only the use of the shared racks from the service group make these objects available for the service group.
After logging in the Mausoleum inspector appears and as in the regular Mausoleum clients you select the type of object you are interested in the top element of the Inspector window:
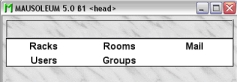
Rooms
The first type of objects which have to be defined within the service unit are the rooms. You cannot define new racks without specifying in which room they are positioned. Also for the caretakers of the service group the room definitions are essential because their session are connected to one room of the service unit. That means that a service caretaker has to specify the room he or she will work.
The individual groups will gain access to a room if they have access to a rack which is located within that room. Therefore the access of groups to a given room does not need to be defined from the service group. It is automatically determined by the access to racks.
The Room table
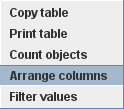
As in all other Mausoleum tables you can select the content you want to see in this table by right mouse click within the table and selecting “Arrange columns” in the context menu:
You will get the dialog for selecting the columns you want to use.
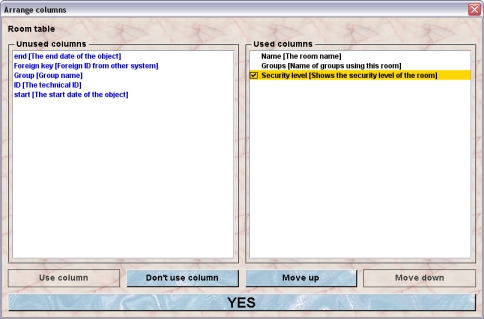
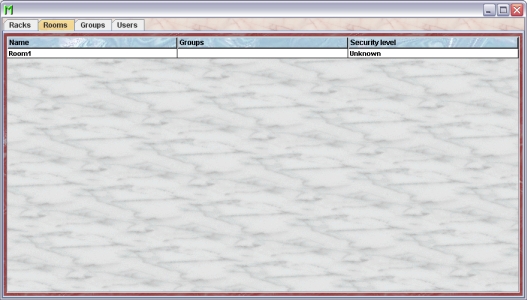
In the shown example the name of the room, the name of the groups having access to this room and the security level (with colour coding) will be shown in the room table.
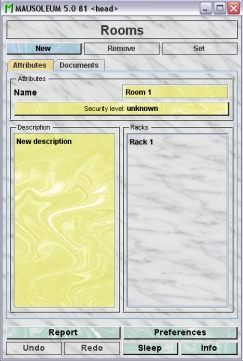
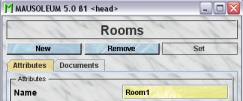
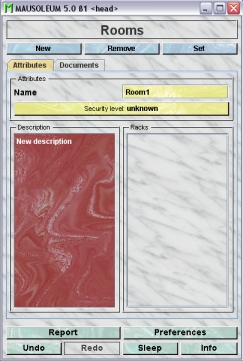
The Room inspector
Upon selection of a room from the list the rooms inspector will show the name the security level and a description of the room. The racks placed in the room are listed.
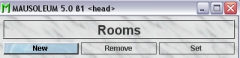
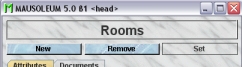
Creating a new room
In order to create a new room you click on the “New”-button in the room inspector.
You will be asked for the name of the new room
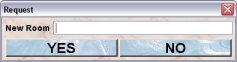
After clicking the “Yes”-button the new room will be created.
Removing a room
Removal of a room in the service unit is only possible if no racks are in this room and therefore no groups have access to this room. You see that the “Remove”-button in the Room-inspector is only enabled if you select a room in the room table which matches this condition.
If you click the “Remove”-button you will be asked whether you are really want to proceed. If you answer this with “Yes” the room will be removed from the service group.
Renaming a room
If you want to change the name of a room you select the room in the room table and type in the desired name in the Name field in the room inspector. After hitting the [return] or [enter] key the name will be set.
You are neither allowed to set an empty name (“”) nor to use a name which is already given to another room.
If “Edit in table” is set to “On” in the Preferences you can also click in the Name column of the room table and type in the new name in the dialog.

Hitting the [return] or [enter] key or preesing the “YES”-button sets the new name for the room. The general limitations for room also apply here.
Setting the security level of a room
Rooms can have different security levels (like SPF). This is relevant if you want to control cage traffic between rooms of different security levels. There are three defined security levels for rooms:
- Low
- Medium
- High
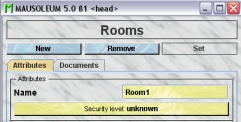
The security level is shown in the “Security level”-button in the room inspector:
To change it you click on this button and will get this dialog:
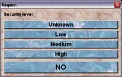
Clicking on of the top four buttons sets the value for the security level. Clicking the “NO”-button leaves the security level unchanged.
The security level of a room has consequences for mouse handling. The following lines are not applicable for the head of the service group because this user cannot transfer mice. They are relevant for regular users or for caretakers of the service group.
Mouse transfers between rooms with a defined security level are not recommended. If you want to transfer mice from one room with a defined security level to another room which also has a defined security level you will get informed by the mouse pope that you shouldn’t do that. If the security level of the target room is lower or equal to the security level of the source room you will get this alert
If you proceed by clicking “YES” a mausoleum mail with the details of this transfer will be sent to the gurus of the group and – if the service group is involved – to the head of the service group.
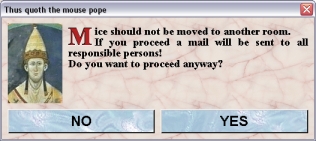
If the security level of the target room is higher than the security level of the target room you will a get an even harsher mouse pope alert:

If you proceed by clicking “YES” you have to give an explanation for this transfer which is then added to the mail which also will be sent to all responsible persons.
Changing the room description
You can give a description for the rooms. In order to edit this description you type in the description in the Description-field. Upon change this field will turn red.
Because there is no clear end-signal (descriptions might contain paragraphs an evene empty lines) you have to press the blue “Set”-button to enter your description into the database.
Racks
If you have defined rooms within the service unit you can start defining the racks which are located in these rooms. Racks in Mausoleum are assumed to have a regular grid with spots each of them capable of containing exactly one cage (or double cage). Racks can be either single- or double sided.
The access of the groups to the service unit is (with one exception see below) controlled by the racks to which the groups have access to.
The rack table
| Column header | Description | Sortable | Filterable | Colorable |
| Cages | Number of cages | ✓ | ||
| Foreign key | Foreign ID from other system | ✓ | ||
| Group | Group name | ✓ | ✓ | |
| Groups | Name of groups using this rack | ✓ | ||
| ID | The technical ID | ✓ | ||
| Name | Name of the rack | ✓ | ||
| Room | The room in which the racks is located | ✓ | ||
| columns | Number of columns | ✓ | ||
| end | The end date of the object | ✓ | ||
| rows | Number of rows | ✓ | ||
| sides | Number of sides | ✓ | ||
| start | The start date of the object | ✓ |
As in all other Mausoleum tables you can select the content you want to see in this table by right mouse click within the table and selecting “Arrange columns” in the context menu:
You will get the dialog for selecting the columns you want to use.
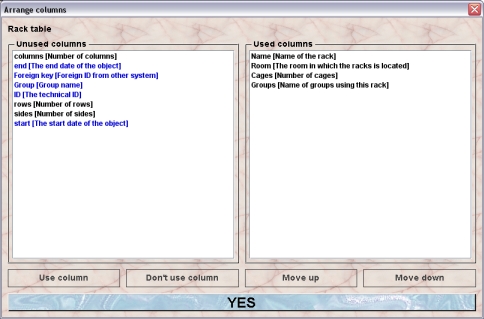
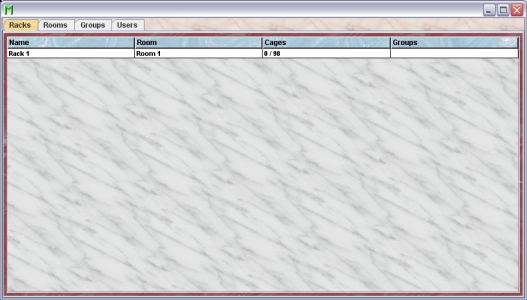
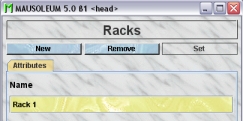
In the shown example the name of the rack, the room in which the rack is in, the number of cages in the rack and number of spots in the rack and the name of the groups having access to this rack will be shown in the rack table.
Creating a new rack
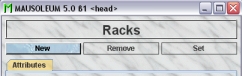
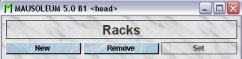
In order to create a new rack you select “Racks” in the top element of the Inspector window and press the blue “New”-button in the rack inspector. Please remember that rack creation is only possible if at least one room is already defined in the service group. Because in this group all the racks have to have a defined location.
In the following dialog you will be asked for the name and the dimensions of the rack:

You are neither allowed to set an empty name (“”) nor to use a name which is already given to another rack. For the dimensions of the rack you have here the following options
- sides: 1 for single- or 2 for double-sided racks
- rows: 4 to 15
- columns: 4 to 15
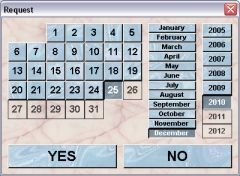
Clicking “YES” brings up the dialog which lets you specify the date when this rack was added to the service unit.
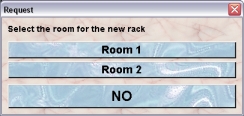
Clicking “YES” brings up the next dialog which asks for the room where the new rack is located. You have the choice between the defined rooms of the service unit. This choice will be presented as dropdown list or as buttons if less than 5 items are available.
Removing a rack
Removal of a rack in the service unit is only possible if no cages are in this. You see that the “Remove”-button in the rack inspector is only enabled if you select a rack in the rack table which matches this condition:
If you click the “Remove”-button you will be asked whether you are really want to proceed. If you answer this with “YES” the rack will be removed from the service group.
Renaming a rack
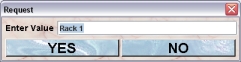
If you want to change the name of a rack you select the room in the room table and type in the desired name in the Name field in the rack inspector. After hitting the [return] or [enter] key the name will be set.
You are neither allowed to set an empty name (“”) nor to use a name which is already given to another rack.
If “Edit in table” is set to “On” in the Preferences you can also click in the Name column of the rack table and type in the new name in the dialog.
Hitting the [return] or [enter] key or preesing the “YES”-button sets the new name for the rack. The general limitations for room also apply here.
Moving a rack
Although in your daily work you won’t change the location of a rack you can (e. g. if you entered a wrong room) change the room where the rack is located. In order to do so you select the rack in the rack table and presse the “Move”-button in the rack inspector. This button is active only if there are additional rooms present in the service group.
In the following dialog you will be asked to which room the rack should be transferred.
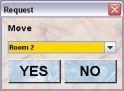
Clicking “YES” trensfers rack into the selected room in the database. All groups which have access to that rack will also gain access to the new room you selected.
Giving a group access to a rack
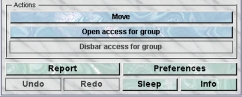
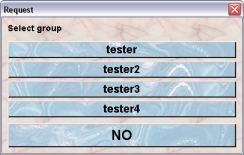
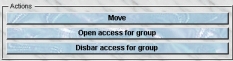
If you want to allow the access of a group to a rack of the service group you select the rack of interest in the rack tabel and click the button “Open access for group” in the rack inspector.
In the following dialog you have the choice between the groups which have no access to the selected rack at the moment. This choice will be presented as dropdown list or as buttons if less than 5 items are available.
Removing the access to a rack
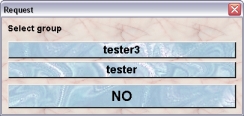
You can disbar the access of a group to a given rack whenever you need to. If you select a rack in the rack table which is accesible from at least one group you will find that the button “Disbar access for group” is enabled.
After clicking this button you have the choice between the groups which have access to the selected rack at the moment. This choice will be presented as dropdown list or as buttons if less than 5 items are available.
A little problem arises if you want to stop the access for a group which still has at least one cage in the selected rack. If this happens you will get a dialog in which you are informed about this fact and you are asked if you agree that those cages will be removed from the rack in the selected group.
Groups
The groups shown in the groups table of the service group client are all regular groups which are defined in the Mausoleum installation. Groups can be created or removed by the Mausoleum Administrator only. So even as Head of the service group you cannot create new groups or remove existing ones.
The group table
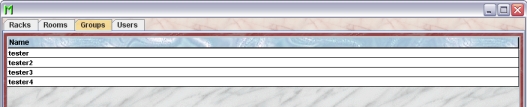
After selecting “Groups” in in the top element of the Inspector window the group table appears showing the names of the defined groups in this Mausoleum installation.
The group inspector
Upon selection of a group from the list the group inspector will show the name of the group which cannot be edited. The racks of that group are listed.
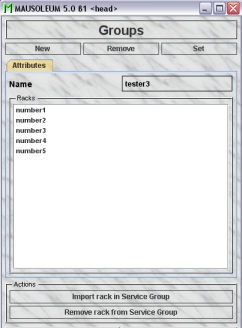
In this example you see that this group has no rack in the service unit because no Rack shows the “[S]” as prefix. If one rack (e. g. rack “number3”) would be part of the service unit this list would like this:
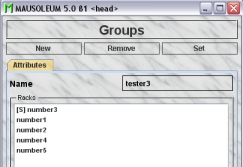
Now you can see that only the rack “number3” shows the “[S]” as prefix indicating that this that rack is now under the control of the service group and accessible for caretakers of the service group.
Importing a rack to the service group
Above the usual way was shown how racks were defined in the service group and groups gained access to this rack. But if the groups have already defined and worked with racks which now should be imported to the service group another procedure can be used.
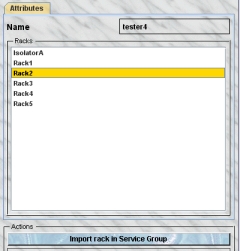
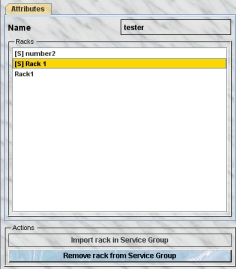
You first select the group in the group table. Then the racks of this group are listed in the group inspector. After selecting a rack which is not yet part of the service group (indicated by the missing “[S]” prefix) in the “Racks” field of the group inspector you will notice that the button “Import rack in Service Group” becomes active.
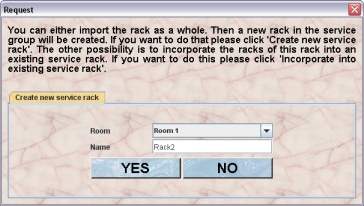
Clicking this button brings up a dialog which lets you choose the details of this import. There are two main options. The easy option is to import the rack as it is and put it into a room of the service unit. This option is always available in the tab “Create new service rack” in the dialog. Here you specify the room where the rack is located and you can also change the name of the rack and thereby apply the nomenclature guidelines of the service group.
But if two groups already used the same rack without the service group and they somehow agreed not to use the same spots for their cages and they do not want to loose the information where the cages sit you want to use a different strategy. In this case you prefer to mix the information from two or more groups. In the first step you will import the respective rack from the first group as it is like mentioned above. Then you select the corresponding rack from the second group and incorporate this rack into the one already present in the service group. To do so you select the tab “Incorporate into existing service rack” of the dialog. This option is available and therefore the tab only present if at least one rack with the same dimensions (sides, row and columns) as the selected rack is defined in the service group which is not already shared with the select group.
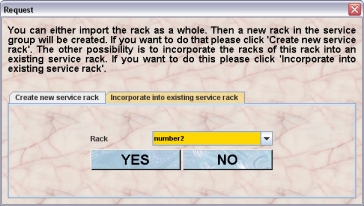
You find a selection box where the possible racks of the service group are shown. After selection of the appropriate rack of the service group you click “YES” in this tab. Now a problem can arise. It is possible that some spots which are used in the group rack are already occupied in the rack of the service rack. If this happens a dialog shows these conflicts. You see a graphical representation of the rack where the spots occupied in the service group only are shown in green, those occupied in the selected group only in yellow and the conflicting spots which are occupied in both groups are shown in red.
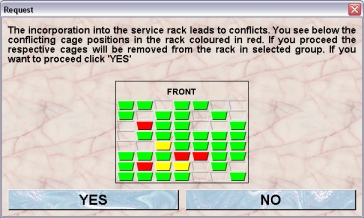
If you proceed by clicking “YES” the cages of the rack in the selected group which are at spots already occupied in the rack of the service group will be removed from the rack and you will find them afterwards in the transfer area.
Removing a rack from the service group
You can also remove a rack of the selected group from the service group. If you do this the rack is still present in both the service group and the selected group. But it is no shared anymore. Therefore the respective rack in the service group will no longer contain the cages of the selected group and in the selected group you cannot see the occupied spots from other groups. In addition the cages of the selected group which are in this rack will not be accessible for the caretakers of the service group.
You first select the group in the group table. Then the racks of this group are listed in the group inspector. After selecting a rack which is already part of the service group (indicated by the “[S]” prefix) in the “Racks” field of the group inspector you will notice that the button “Remove rack from Service Group” becomes active.
After clicking this button the rack is removed from the service group and in all groups which share this rack the information about occupied spots etc. is updated.
Getting reports for the groups
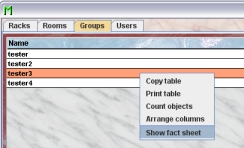
As head of the servcie group you can produce detailed reports for all the groups. These reports show the number of mice, cages and matings listed by rack, by room and by license. To get these reports you select in the group table the groups you are interested in and press the right mouse button. In the context menu you select the item “Show fact sheet”
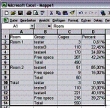
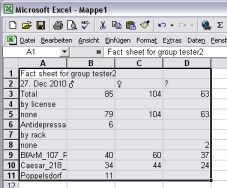
The window with the fact sheets will appear and you receive the group report for the selected groups.
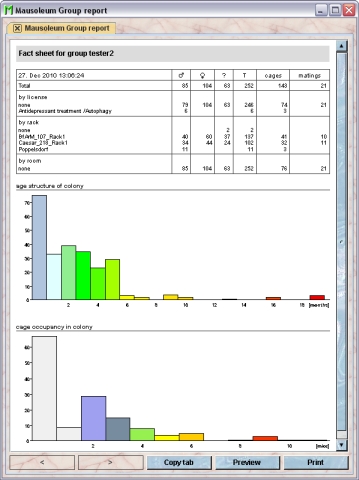
You see below the table with the statistical information diagrams which show
· age structure of colony: The height of the columns represent the number of mice in that colony having the same age in months.
· cage occupancy in colony: This diagram tells you how many cages are present in the colony with a given number of mice within.
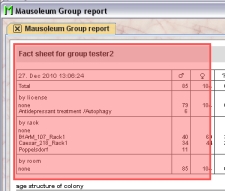
The reports can be printed and the numbers can be transferred to other programs (e. g. Excel) for further analysis. To select data from fact sheets to the system clipboard you just drag the mouse with pressed left mouse button over the data you want to copy.
After releasing the left mouse button the data which can be transferred to the system clipboard is shown with individual frames aorund every detected data element.
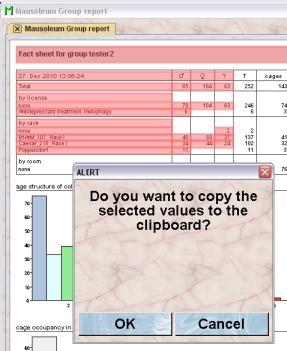
If you select “OK” in the dialog the data elements are transferred to the system clipboard in a way that they are available for the paste operation in other programs (e. g. Excel)
Users
In the service group you also have defined users as in the other groups in your Mausoleum installation. But the users roles in this group are quite restricted. In this group there only two possible kinds of users:
HEAD OF SERVICE: This user is the main user of the service unit. This user can create new racks and rooms and is responsible for the distribution of these objects to the groups. In addition this user can create reports for the groups and for the whole service unit.
SERVICE CARETAKER: This user is the one working with the mice and cages within one room. He or she can see and modify the attributes of all the mice within the room regardless of the group to which they belong.
The User table
As in all other Mausoleum tables you can select the content you want to see in this table by right mouse click within the table and selecting “Arrange columns” in the context menu:
You will get the dialog for selecting the columns you want to use.
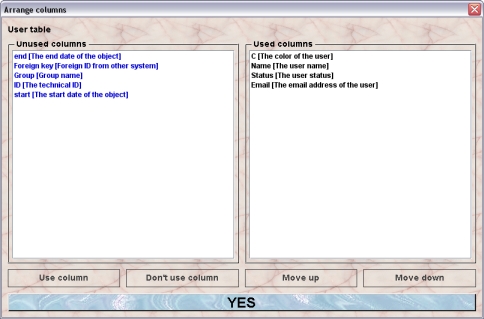
In the shown example the color, the name, the status/user role and the email of the user will be shown in the user table.

The user inspector
Upon selection of a user from the user table the user inspector will show the attributes of the selected user.
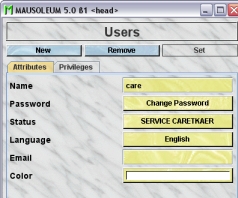
As usual you can edit the fields shown in yellow by clicking or editing the content.
Creating a new user
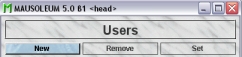
You creat new users by clicking the “New” button in the user inspector.
A dialog will appear in wgich you will specify the name, password and status/user role of the new user. As mentioned above in the service group there are only two different user roles:
HEAD OF SERVICE: This user is the main user of the service unit. This user can create new racks and rooms and is responsible for the distribution of these objects to the groups. In addition this user can create reports for the groups and for the whole service unit.
SERVICE CARETAKER: This user is the one working with the mice and cages within one room. He or she can see and modify the attributes of all the mice within the room regardless of the group to which they belong.
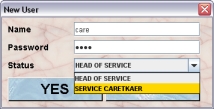
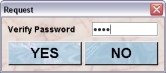
If you confirm the data using the “YES” button you will be asked to reenter the password thus completing the input.
Getting the report for the whole service unit
The head of the service group can also produce a report for the whole service unit. The focus of this report is a bit different compared to the reports for individual groups. In this reports the number of cages within the whole unit, each room of the service unit and the racks therein is shown for each group and in total as well as the unused space for each element. In oreder to get this report you click the “Report” button in the Mausoleum inspector.
![]()
You will get a report for the service unit with tables containing information about the number of cages per group and a graphical representation of these numbers first for the whole unit and details for each room and below for each room with detatils for each rack.
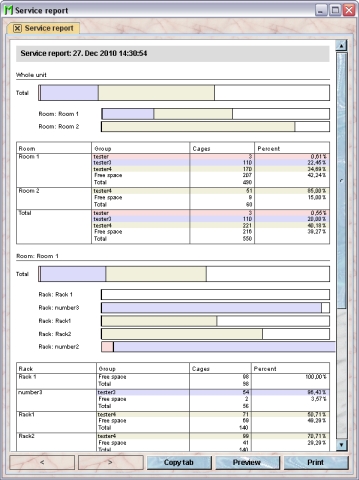
The colors are given for each group in the graphical representation and in the tables containing the numbers.
The reports can be printed and the numbers can be transferred to other programs (e. g. Excel) for further analysis. To select data from fact sheets to the system clipboard you just drag the mouse with pressed left mouse button over the data you want to copy.
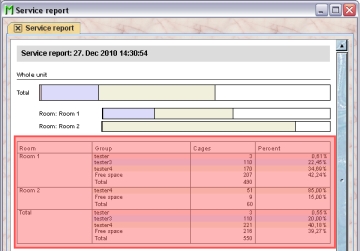
After releasing the left mouse button the data which can be transferred to the system clipboard is shown with individual frames aorund every detected data element.
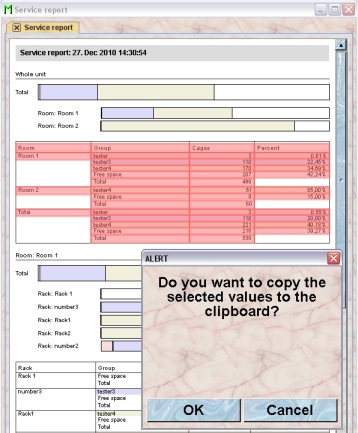
If you select “OK” in the dialog the data elements are transferred to the system clipboard in a way that they are available for the paste operation in other programs (e. g. Excel)