Mausoleum
Inspector
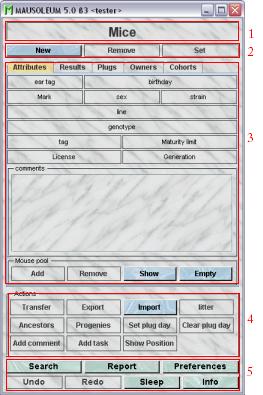
The inspector is the main window of Mausoleum. It changes its appearance depending on the currently active table. In the inspector you can see and edit the attributes of the currently selected objects (like mice, lines or cages). It is also the place to invoke actions specific for a given object type.
The inspector can be divided into five areas.
Ā
- The object selection field: Here you can select the different objects by clicking once in the field. A drop-down menu appears were you can choose the desired object type e. g. mice, lines or cages.This field shows the object type for which the Inspector is currently adapted.
- The buttons "New", "Remove" and "Set" allow you if you have sufficient privileges to create new objects of the current type (e. g. new mice, new lines or new cages), to remove objects or to set the modified attributes. Since the Inspector changes function depending on the selected object type the action button has the same function but the effects are on different items.
- The third area changies dependent on the currently displayed object type. It can contain different tabs. Usually you find here an "Attributes"-tab where the attributes of the selected objects are displayed and can be modified. For several objects additional tabs can be found here like the "Mice"- the "Cages"- or the "Documents"-tab which are described below.
- The buttons in the "Actions" area are also dependent on the current object type. Their activity status adapts to the objects selected in the corresponding table and let you perform actions not directly ed to an attribute.
- This area contains buttons for general actions like "Undo" or "Search".
The "Attributes" tab
In this tab the attributes of the selected objects are shown. All the fields and buttons in which the values can be changed are shown in a yellow color. Otherwise they are shown in grey. Depending on the attribute and the selected objects it is possible to change the atribute of more objects at once.
The "Mice" tab
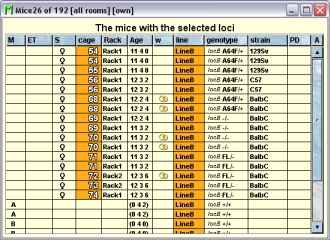
If this tab is present you see here a table with the mice which are associated with the selected object. In this example of the locus inspector you see here all the actual mice which have a line with one of the selected loci.

Because this table is within the inspector it cannot be used to modify the attributes of the displayed mice. To generated a mouse table which can be used to alter the attributes of the mice you click the button "Convert this view to Mouse display" and a window with a table containg the mice will open:
The "Cages" tab
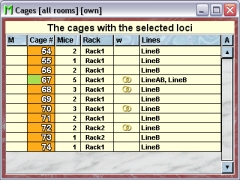
If this tab is present you see here a table with the cages which contain mice associated with the selected object In this example of the locus inspector you see here all the actual cages which contain mice which have a line with one of the selected loci.
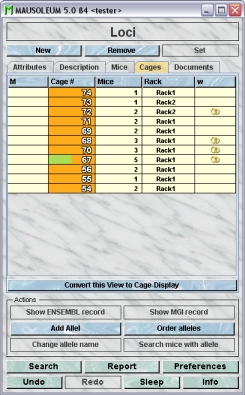
Because this table is within the inspector it cannot be used to modify the attributes of the displayed cages. To generated a cage table which can be used to alter the attributes of the cages you click the button "Convert this view to Cage display" and a window with a table containg the cages will open:
The "Documents" tab
This tab lets you store and exchange documents like pdf- or Word-files with additional informations about the strains of your group. In this tab you will find a list with the document which have been uploaded to the server.
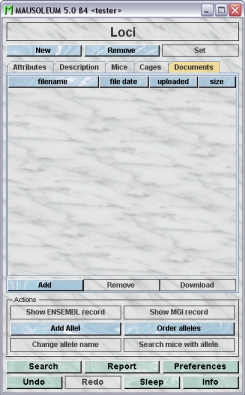
GURUs can add new documents for the selected objects by clicking the "Add"-button beneath the documents list. You will be asked for the location of the document and after congfiming this dialog the file is uploaded top the server and will be displayed in the list. GURUs can also remove documents by selecting one of the documents in the list and clicking the "Remove"-button beneath the documents list. You can download a document and store it on your client computer by clicking the "Download"-button.
The general actions
- Search: You can search mice and cages with specialized user interfaces described in the section "Search"
- Report: Clicking this button shows a report for the whole group where mice, cages and matings are listed according to several criterai such as license, rack, line and user. The content of the report is described here.
- Preferences: Opens the dialog for customization of Mausoleum. A detailed description can be found here.
- Undo: If active you can click this button to revert the previous action.
- Redo: By clicking this button you can revert a previous "Undo"-command
- Sleep: Sets this Mausoleum session in a dormant mode. Se below for a more detailed description
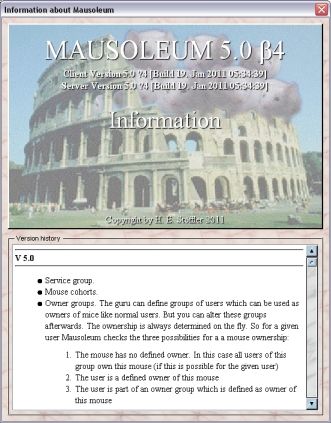
- Info: Opens a window with version information for the server and client program and the version history listing all the changes of the last program versions
The dormant mode
From time time to time it might be the case that client licenses are in scarce. To reduce the amount of used licenses you can set Mausoleum in the dormant mode. This means that the Client is still connected to the server and is notified upon all object modifications but it is not counted as avtively used license and on the other hand can neither display nor alter objects while it is set to the dormant mode. You easily detect a domant Mausoleum client by the contents of the inspector:
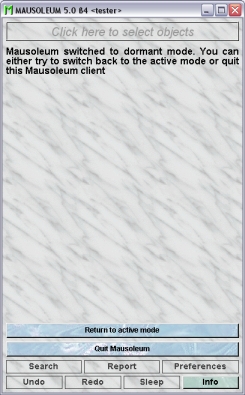
You see an empty inspector in which you ave two buttons:
- Return to active mode: If you click thsi button the Client tries to change its state to active again. If the amount of Client licenses is not sufficient you will get an alert and the Client stays in the dormant mode.
- Quit Mausoleum: Ends this session and stops the Mausoleum client.
The dormant mode can be invoked in two ways. One way is that you set your Mausoleum client manually to dormant by clicking the "Sleep"-button in the the lower part of the Inspector. In addition the client registers longer idle periods while no action occurs. After 30 minutes of idle time you will get this dialog:
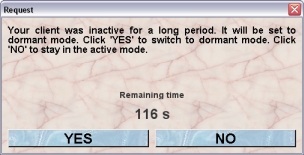
Now a countdown is started. During the remining time you have the opportunity to return to the active mode by clicking "NO". If you click on the "YES"-button or the remainig time is over, the client is set to dormant mode.
Ā