Mausoleum
Tables
Tables are used in Mausoleum as a general display tool for the various objects stored in the database. The possible contents and the appearance of these tables depends strongly on the object type displayed in the respective table. There are nevertheless several common features of Mausoleum tables.
Primary and secondary tables
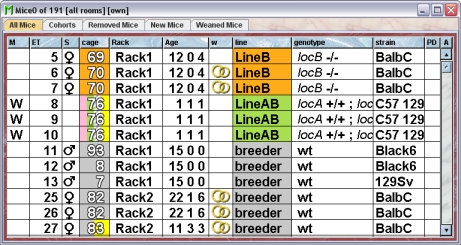
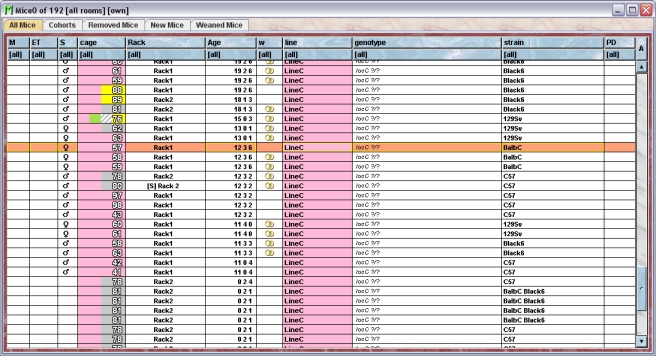
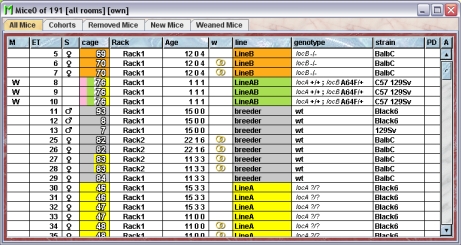
There is for each object type (like mouse, cage, line etc....) one primary table which contains all the active objects. It is this primary table which is shown when you select the respective object type in the Object selection field in the inspector. The main table is always shown with a white background as shown here for the primary mouse table:

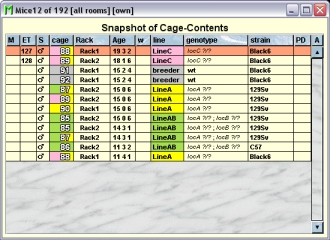
There are also secondary tables in mausoleum e. g. the tables which show the contents of a cage. These tables contain only a subset of the objects and can also contain inactive objects or dead mice. These tables always have a yellowish background as shown here for a secondary mouse table which shows the contents of a cage:
The active table
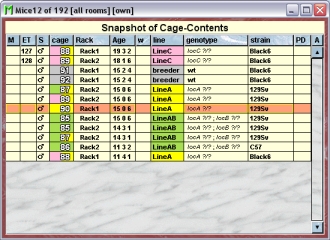
The Mausoleum inspector adapts to the selection of objects in tables. Because there is only one inspector in can only adapt to one table. This one active table is marked with a red border around it. Please compare the following image of the same table as shown above which was now selected and became the active table:
The width of columns can be adjusted by moving the border between two columns. If you double click on such a border the width of the column left to the border will be set according to the maximum length of the contents of this column as good as possible.
Sorting
You can sort the contents of the table according to the contents of a given column by double clicking the respective column header. A second double click on the same column header will resort the table according to the contents of this column but the sort direction (ascending or descending) will be inverted. The sort direction is indicated by a little arrow on the right side of the column header.
Edit in tables
If editing in tables is selected in the Preferences you can edit certain cells in the tables directly without the need to set the values in the inspector window. The cells in which direct editing is possible are highlighted by a yellow border if the corresponding line is selected:

In this example from a mouse table you can see that it is possible to edit mark, eartag, sex and age of the mouse but not the cage or rack in which the mouse is located. Clicking in one these yellow bordered cells will open the the appropriate dialog (e. g. the dialog for the birthday if you clicked in a cell of the "Age" column).
The context menu
In every table in Mausoleum you can get a context menu by clicking the right mouse button. The available menu commands depend on the contents and the selection in the individual table. Nevertheless there are several commands which are present in the context menu of all tables.
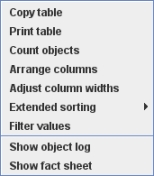
These commands will be described below. Depending on the object type displayed, there can be additional menu items below these general commands. At the bottom part you find the equivalents of the active action buttons found in the active inspector.
Copy table
You can copy contents from the table to the clipboard and import it later in other programs for further analysis. If you select this command, a dialog opens asking for the details of the copy procedure:
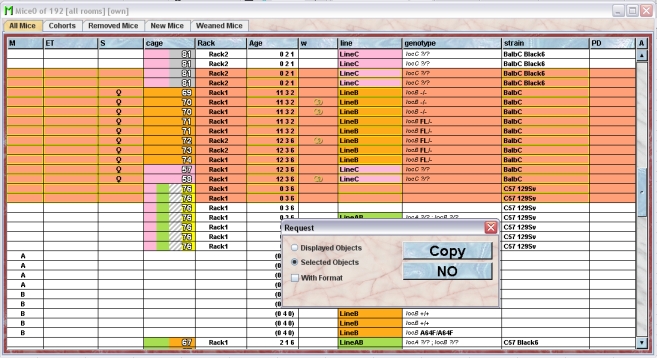
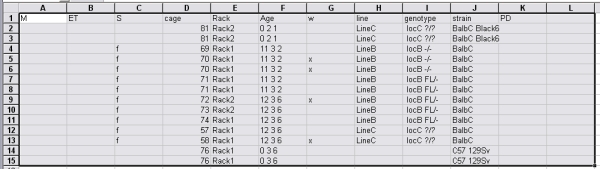
You can either copy the complete displayed contents of the table or only those lines which are selected at the moment. You can also copy the format of the table cells. But it depends on the receiving program whether this can be imported. After clicking "Copy" the contents is transferred to the clipboard and can be pasted in other applications (e. g. MS Excel):
Print table
You can print the contents of the table. If you select this command a dialog opens asking for the details of the print procedure:
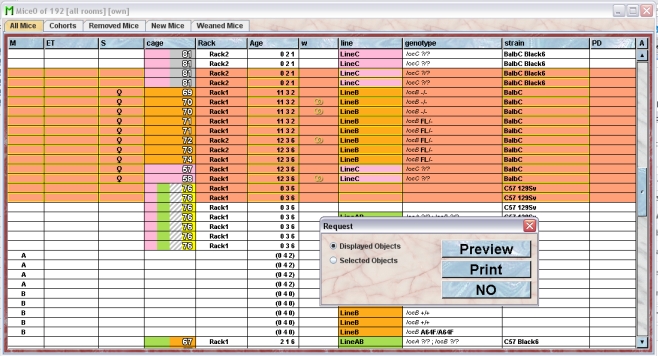
You can either print the complete displayed contents of the table or only those lines which are slected at the moment. Clicking "Preview" or "Print" brings up another dialog where you specify the format of the printout.
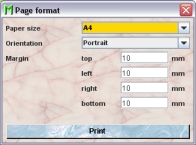
After you defined the page format proceed by clicking "Print" which either brings up the printer selection dialog of your system or, if you had selected "Preview" before, shows the print layout in a separate window:
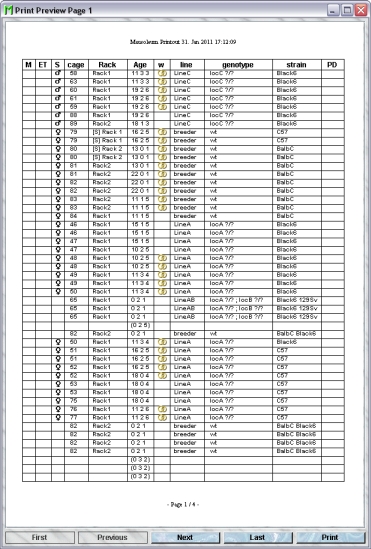
You can browse in this window through the pages or start the printout by clicking the "Print"-button
Count objects
This command gives you the number of objects currently displayed in the table.
Arrange columns
For each object type there are numerous values which can be displayed in a table. But usually you don't want to use all of the possible columns. You will therefore select and order the desired columns using this command. After selecting this comnmand� you get a dialog which allows you to specify the columns and their order in this table. As an example this dialog is shown for a mouse table:
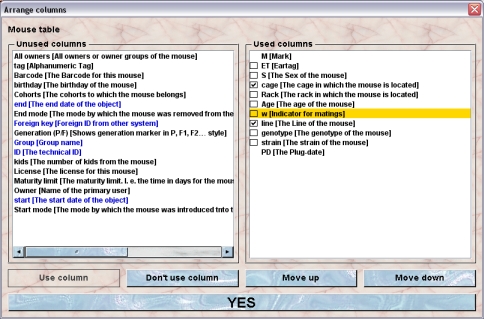
You see two lists containing the possible columns for this object type. On the left side you see the columns which are not used at the moment whereas on the right side you see the columns which are currently displayed in the table. If you want to use a column which isn't used at the moment you select this column in the left table and click on "Use column". On the other hand if you want to get rid of a column in your table you select it in the right list and click on "Don't use column".
Columns in the list of unused columns are sorted alphabetically and in the list of used columns the order reflect the order of the columns from left to reight in the table. You can change the order of the columns in the tbale by selecting a column and clicking the "Move up" and "Move down" buttons.
Columns specific for this object type are shown in black whereas columns with general informations are shown in blue.
In addition you can specify which columns should have a colored background. Those columns which have an associated color mode have a little checkbox in front of the name in th right list. You determine whether the respective column should be colored by selecting or deselcting the checkbox.
Adjust column widths
If you select this command the columns get resized so that they match the needed width as good as possible.
Extended sorting
In addition to the simple sorting of the table according to the content of one column you can also perform and define more complex sorting procedures. Extended sorting is of course only available if the table contains more than one item. You might have already realized that the menu item "Extended sorting" has a submenu.
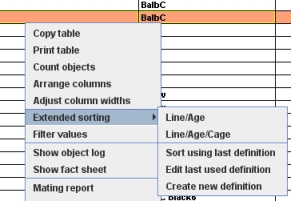
In this sumenu the user defined sorting procedures are listed on top if there are any. The item "Sort using last definition" let you sort the tabel according to the last edited defintion. "Edit last used definition" and "Create new definition" brings up a dialog which allows you to specify more complex sorting definitions.
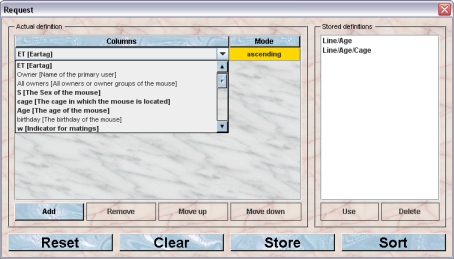
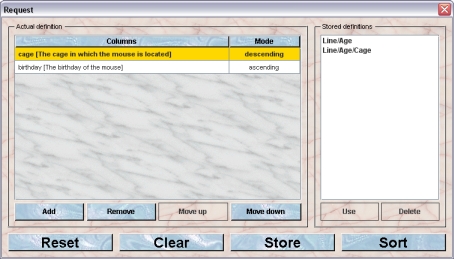
In this dialog you see on left side a table showing the sorting criteria. You can select the column from all possible columns. You are not restricted to sort according to columsn which are displayed in the table. The ones which are currently displayed are shown in bold wheras thos which are not on display in the table are shown with a lighter font. You can also specify the sort direction (ascending or descending) of the individual columns. You can add additional sort criteria by clicking the "Add"-button. "Remove" will remove the selected line. You can specify the order by which the criteria are evaluated. The top most is the primary sort criteria. Only if two objects in the table are equal for the value in that column the next criteria is used and so on. You can determine tis sort order by selecting a line and using the buttons "Move up" and "Move down".
You can also store a sort definition. If you click the button "Store" you will be asked for a name for this definition and the definition is then stored on the server for this user. The known defintiions are shown in the list on the right side of the dialog.
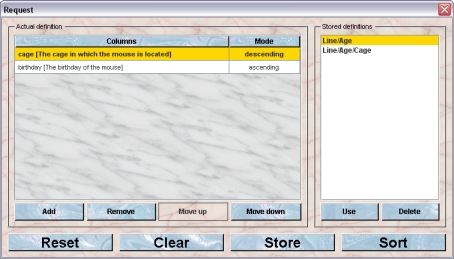
You can refine a stored definition by selecting the definition in the list and click the button "Use". This will copy the criteria of this stored definiton to the table on the left side and enables you to modify the criteria. In order to remove a stored defintion you select the defintion and click the button "Delete". The respective definition will then be removed from your list of known sort definitions.
Filter values
You can also filter the values in Mausoleum tables. The function works similar as you might be used from other programs (e. g. the "Auto filter" function in MS Excel). It is quite useful to narrow down the contents of the table to those objects you are interested in at the moment. To activate the filtering you select the command "Filter values" in the context menu. You will detect a second header line in the table.
Those columns where no filtering is used show "[all]" in this line indicating that all values are allowed. You can click in the filter line and will get the possible filter values. In all columns it is possible to select "[empty]" which leeds to a filtered table where only empty values are allowed in this column and "[non empty]" which allows only defined values in this column.
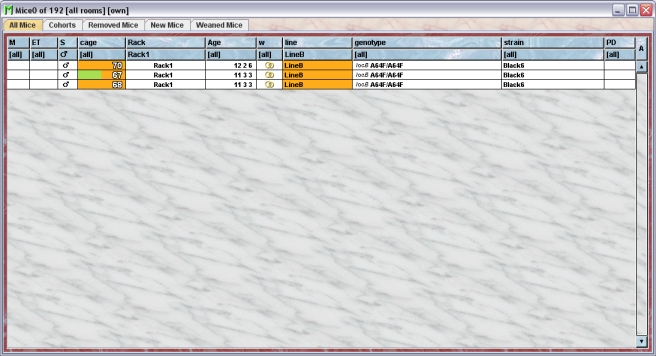
Depending on the column it is also possible to select from the values present in that column. In the example shown below the mouse tabel is restricted to male mice of LineB in Rack1. Immediately you see that there only theree mice mathicng these criteria.
If filtering is used you can deactivate it using the command "Don't filter" from the context menu.
Show object log
This command allows you to investigate for every object when and by whom its attributes were modifeid. After selecting this command from the context menu a window opens showing the object log.
Show fact sheet
It is possible to get a detailed fact sheet for all objects in Mausoleum. Such a fact sheet contains the attributes of an object and depending on the object type much additional information e. g. a list of all cage visits of mouse and the mice which were in the respctive cage at the same time. A more detailed descripion of fact sheets can be found here.
Table font size
The size of the font used in the Mausoleum tables can be set in the Preferences. Here you see a mouse table with a 12 pt font size:
After setting the font size zo 20 pt the same table looks like this: